Making a T.A.R.D.I.S. case for a raspberry Pi media centre.
So you've jumped on the new nerd fad and got yourself a Raspberry Pi?
Just think of all the cool things it could become - a robot brain, a controller for your own aerial drone, a classic arcade box with a fancy
MaKey MaKey controller, your own weather station,
a learning tool for younger folk to start programming...
Ok so, media centre it is.

For this you will need:
- a RasPi (oddly enough)
- SDHC card (this is your hard disk so needs to be large, fast & reliable - I used a 16GB Samsung, class 10)
- a powered usb hub (this should probably be the only thing you plug into the PI's usb ports).
- a power supply (The Pi requires a stable 5v 1A power supply, so no you can't just plug it into any old usb port or use whatever phone charger you have lying around. If you hadn't already guessed this much, then I highly recommend just looking for a power supply that explicitly states it will work with a Pi. Getting something like this would be handy: it's a powered hub that can also power the Pi itself. But yes, most hubs wont do that so beware.)
- a Wifi dongle (must be connected to the hub, the onboard port wont have enough power, especially not if you're using bluetooth as well)
- a (bluetooth) keyboard/mouse/trackpad/controller (depending on what you're most comfortable with using. I used a Logitech K400, mostly because I like full size keys and the inbuilt track pad is good enough to use when needed)
- a gold plated hdmi cable, encrusted with 4 carat diamonds and hundreds and thousands of other exotic jewels from across the globe. Actually, feck the gold plating, you should get Platinum or Californium 252 plated cables, because you know what digital signals are like, only the finest types of cable can distinguish between a high and a low voltage.
(alternatively, you could just buy a kit with all this stuff included, they're pretty common now)
Next, grab yourself an OS - Raspbmc if you only want the media centre,
Raspbian if you want a more versatile desktop OS.
(OpenElec has just gone to version 3 and is getting good feedback,
you may want to try that out either [haven't done so myself yet.])
Raspbmc is the simplest to get working, but also more limited.
Raspbian will require a little more configuration (but it is linux, what do you expect?) but this does give you more options of what you can do with you Pi (as well as your basic media functions).
If you're not sure, just get a few SD cards, load up an operating system/configuration on each one and swap the cards as needed until you find a setup that suits you best.
There are other options out there of course, but if you're reading my ramblings as an introduction to the Pi, then you're probably best off sticking with the options above.
Now this next section is very complicated, so pay attention.
(If not already on the card) Install the software, but the SD card into the Pi, connect everything up, then turn it on.
....
Phew! After all that, you'll probably want a break so go grab a coffee (yes, another one if you've gone the Raspbmc route).
If you chose Raspbian, you might want to look at this (although, that may be obsolete by the time you're reading this).
You could also download this python script if you have a default Raspbian install, just want the OMXPlayer setup up correctly, audio over hdmi, a mild overclock boost, Transmission installed, and if your name is Siobhan (Sorry, if your name's not Siobhan this simply wont work for you - but hey, you can still look at the source and get an idea of what you could do with your own stupid name.)
A note on installing Transmission bit-torrent client on Raspbian, Raspberry Pi
A general search online for RasPi & Transmission and/or bit torrent will turn up lots of results for a bittorrent server/daemon.
If you only want the client like on your regular desktop, then ignore those results and the RPC setup stuff, all you need to do is open the LXterminal and run:
sudo apt-get update
sudo apt-get upgrade

  sudo apt-get install transmission
- the first 2 lines here will probably be run with every software update/install.
- 'sudo' just means super-user, so you have permissions to change stuff on the pi.
- 'apt-get' is the "Advanced Packaging Tool" for managing software updates.
- 'update' just get the list of latest packages so the system knows what the latest version numbers are (doesn't actually update any software) - you'll need to run this to find the latest version of transmission.
- 'upgrade' does the actual software upgrade, for any out of date packages on the system, generally a good idea to run this every now & then anyway.
- 'install transmission' does the actual install of the app. After install, it should show up in the 'internet' section of the start bar.
I've included this here so that there's at least one clear answer to installing the transmission app on your Pi.
But yeah, this isn't a *nix tutorial (just including that bit so that there's at least one clear answer online), this story is all about woodworking, so on with the show:
It's a truth universally acknowledged that a person in possession of a Raspberry Pi media centre must be in want of a cooler looking case for it.
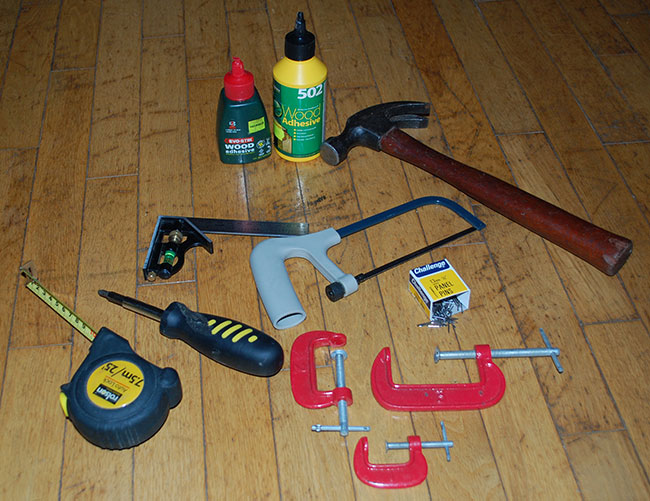
To make this case you will need:
- high grade plywood (5 ply if you can)
- a bench saw with adjustable angle
- Polyurethane wood glue (Polyvinyl acetate would also do but of course we all know the limitations; you may also opt for Epoxy or Resorcinol formaldehyde but that may be a little overkill; if you can't find metal stucco lath, use carbon-fibre stucco lath.)
- a Ron Swanson mustache
- probably some dowels (whatever they are)
- lots of other fancy tools, like measuring yokes, things with straight edges and all that sort of thiing
- some doves' tails for the joining things
- some plans and fore-thought, probably
- and a reference image for what the thing should vaguely look like...

But y'know, we can't all be the Jesus of the carpentry world, so just have to make do with what we can, including small city-centre hardware shops that are usually only open while you're in work and only have a limited supply of stuff; and a relatively small apartment instead of a proper, fully kitted out workshop to mess up.
First thing is the wood.
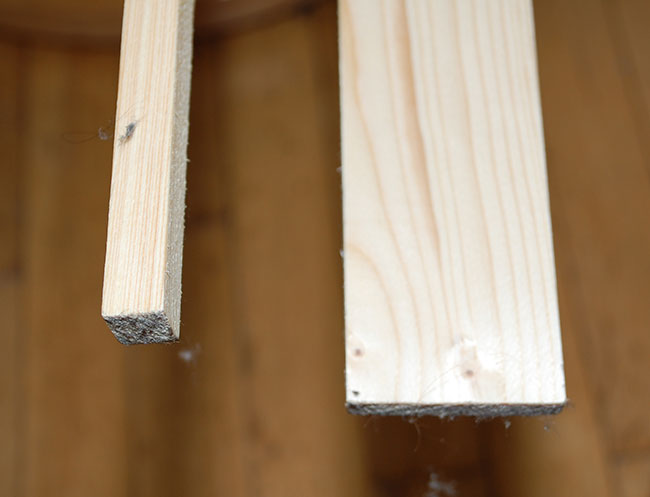
I got some lengths of 12mm square and 8mm * 45mm, the square rods were strong enough for the frame, the wider stuff was a little better than balsa wood, so good enough to make the sides, but not strong enough on its own.
If you happened to have a nice bench saw at your disposal, cutting these to size at perfect right angles would be easy. If like me, you've only got a hacksaw then prepare for some messy joints.
Having some proper measurements and plans would probably make things easier, but where's the fun in that? I just said feck it, and measured & cut as I went, starting with the four corners.
This was just 4 of the 12mm*12mm and 6 of the 8mm*45mm cut to 200mm lengths.
Because of the kind of wood I could get, the sides here ended up as a 2 wide pieces along side each other (and the base & top are similar)
So - put two of the 8*45s at right angle to each other along one edge and stick a 12*12 inside for support.
Do this twice for the back 2 corners.
With the 2 remaining 8*45*200mm bits, stick the 12*12s flush along one edge, like so:

Note about (significantly less than) nine inch nails: You can use the panel pins to hold these together during construction but don't be fooled, these aren't really nails and aren't going to keep it together in the long run. What you really want is some wood glue, and the g-cramps off of your industrial percussion set. If you haven't tried to copy Einstürzende Neubauten and don't have a percussion set to hand, then I'm sure you could get some clamps (or straps or even just string and blocks) elsewhere. Basically you'll probably end up using a combination of the panel pins and something else just to hold the joints in place while the glue dries over night.
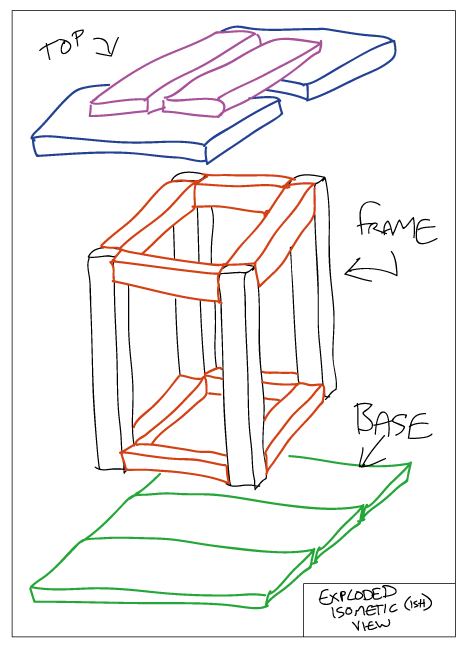
Next, complete the frame and join all 4 corners together with 8 60(or so)mm lengths of the 12mm square rods. I say ‘60 or so' because depending on how you put the corners together, the length needed may vary. With a little planning it should be something like this:

Or you could do what I did and screw up the uniformity just a little bit... and then need to measure in place & cut to suit. 4 on top & 4 at the bottom. And yeah, I wouldn't even bother trying to nail/pain those - hammering things doesn't always help keeping them together.
If you don;t already have one, then most likely you've been looking for an excuse to get yourself a rotary multi-tool - so here you go, you'll need one now to start correcting your mistakes.
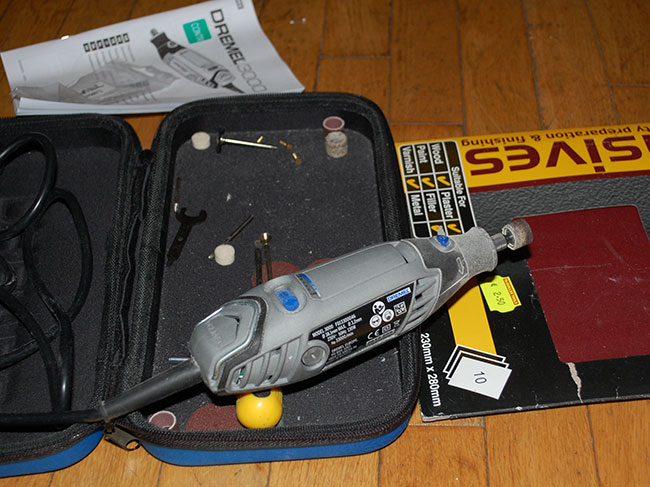
With some aggressive sanding, you can basically plane down the messy edges while you realise that using a feckin hacksaw was a terrible idea and maybe all that measuring stuff isn't just for squares after all.
The base is just 3 lengths of the 8*45 cut to 135mm and glued into a square.
The top is 2 more of those cut to about 120, and another 2 cut to about 100, and laid out something like this:

Leave enough of a gap in the middle for the lamp bit.
(And yeah, there are some big gaps there, but that's fine we'll fix them up soon with a magic ingredient.)
The doors are just 2 more ‘side' bits, but with some hinges. Doesn't really matter what kind, just as long as they're small enough to fit and strong enough to hold.
I used something like this,
2 on each door.
The screws go into the 12mm frame fine, but protruded a little through the 8mm doors, that's fine, just use a different bit on the multi-tool to file down the sharp end of the screws once they're in place.
We'll cover up the mess soon enough anyway.
At this stage, you'll have a fairly plain looking box with doors and an odd looking top.
If you haven't been grinding bits off with the multi-tool yet, then you're doing it wrong - by now the project is more sculpture than woodwork.
It's supposed to be a bit messy
and uneven because that adds to the charm - probably - idunno, it's something about it being more rustic and obviously handmade as a refreshing break from the overly polished and perfect constructions of the modern digital age and blah blah blah. The point is that I definitely planned it out to be like this for 'artistic reasons' I can certainly assure you of that.
Magic ingredient: Lollipop Sticks
So yeah, once it's roughly in shape it's time to eat a lot of Tangle Twisters - and I mean a lot - and save the lollipop sticks.
(Or you could just buy packs of these in the arts & craft shop when you go to get the paint, but where's the fun in that?)
Using a decent scissors, you can chop off the roundy bit at the ends and cut shorter sections for the cross frame.
With lots of gluing, add these around the doors and the sides to create the paneling (and cover up the mess - but remember that the Tardis has 4 sections on the doors, not 3 - doh.)
And similarly to cover up the gaps in the roof/top bit:

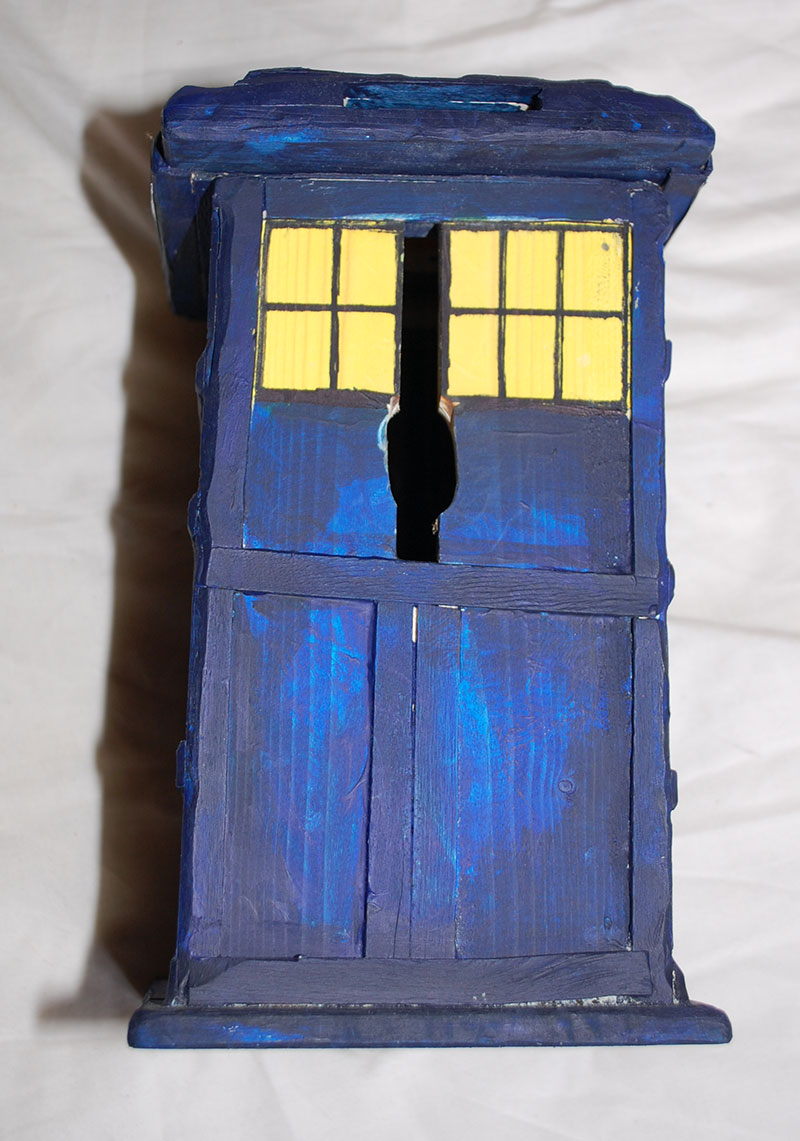
The lamp section is just 4 match sticks and a square of lollipop stick. This bit is awfully delicate until the glue sets, so be careful.
Paint
'Tardis Blue' actually varies depending on the series (it was even grey initially), a typical RGB value might be #102372 but unless you get process cyan/yellow/magenta/black and chemistry kit to mix the exact proportions, these sorts of colour refs aren't all that helpful.
I used
standard acrylic paints you'll pick up in any arts & crafts shop, wit the colours Payne's Grey and Phthalo Blue.
The grey (black really) got slopped down in patches around the corners and insides and such. Then while still wet, the blue got slobbered on over it and covering the whole thing, giving the paint job a bit of texture.
For the windows, I just used some yellow water colour, this let the wood grain show through and gave a bit of contrast to the heavy acrylic (which i then messed up a bit by using a black permanent marker to draw in the frames over it).
The signs are just a standard inkjet print on sticker paper. A standard google image search should find some decent quality versions of these that you'll probably adjust and size to suit in Photoshop/GIMP.
Some clear paste over standard 100+ gsm paper might stick better than the sticker paper I used, but yeah, try that yourself if you care enough.

Conclusion
...and that's about it.
I had kinda planned on adding an LED for the lamp, using WiringPi to control it... but then I got that usb hub with some awfully bright LEDs on it already so no need for that.
I could've paid a bit more attention and/or got some better tools and built it more accurately, to scale, and evenly finished; but yeah, feck that, this way it's unique.
To add to that, you'll notice these instructions are barely instructions at all, with only a vague nod to process, measurements, etc.. but pfft, if you actually want to make one of these you'll find that all the fun is in feckin it up and then working out how to to fix it again.
Some of the more astute readers may also notice that its not even a RaspberryPi case, it's just a wooden box! you could put anything in there (within reason, it's not actually real tardis after all...).
You could even paint it red if you prefer Inspector Spacetime.
Or y'know, you
could use your own imagination and stop copying me ya lazy gobshite. There's all sorts of things you could make with even the crappiest of supplies from the little hardware and art & crafts shops, so yeah, feck off and make your own and don't do what I did.
Comments/Suggestions/Feedback/etc
Gallery
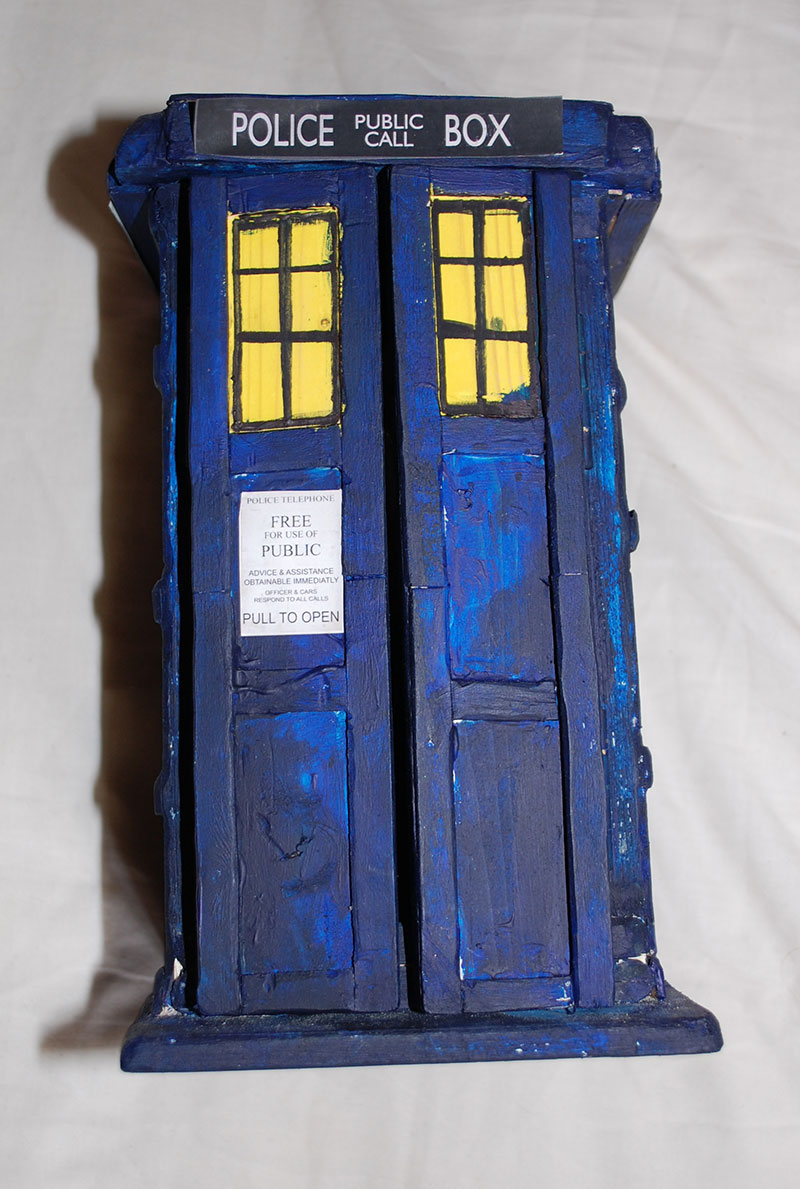
Note the messy paint job and the wrong number of panels.
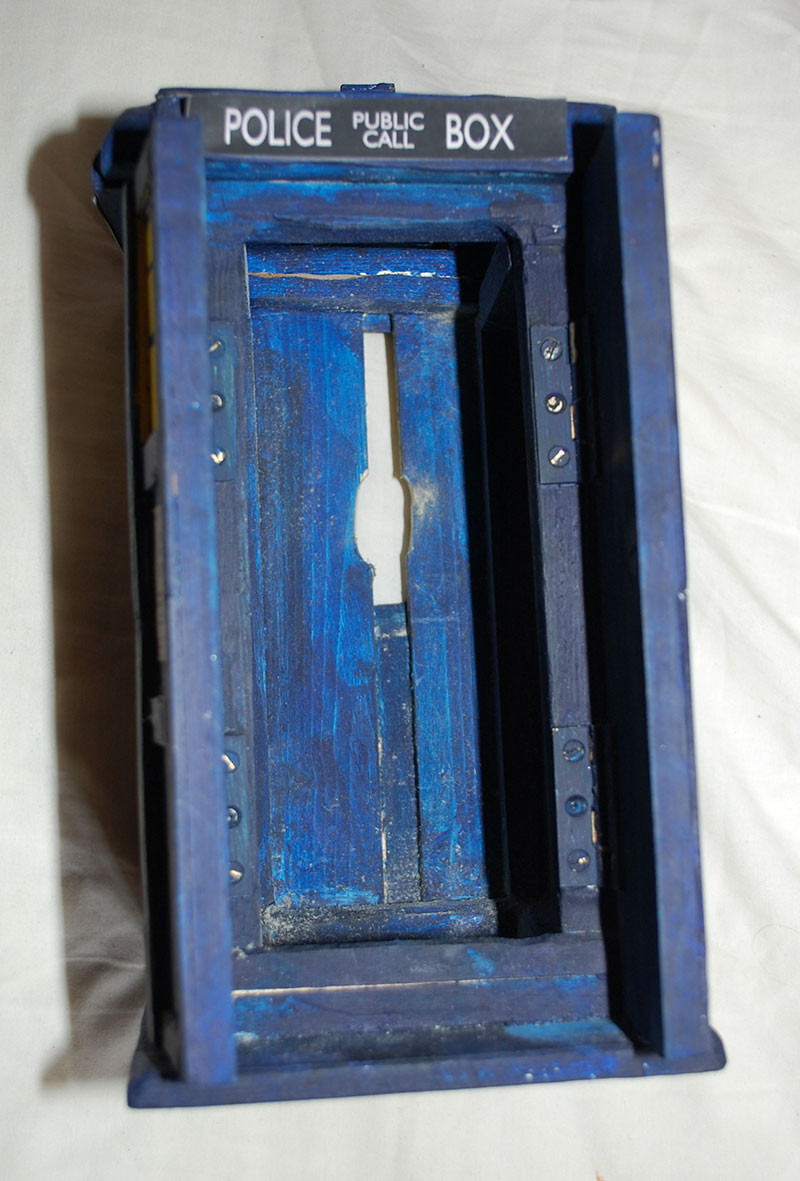
You can see the hinges here and those screws were a bastard to get in, so yeah, at least 2 on each side was enough.

Correct number of panels, and yeah - lollipop sticks are just wood too, so glue 'em on and sand 'em down as normal.
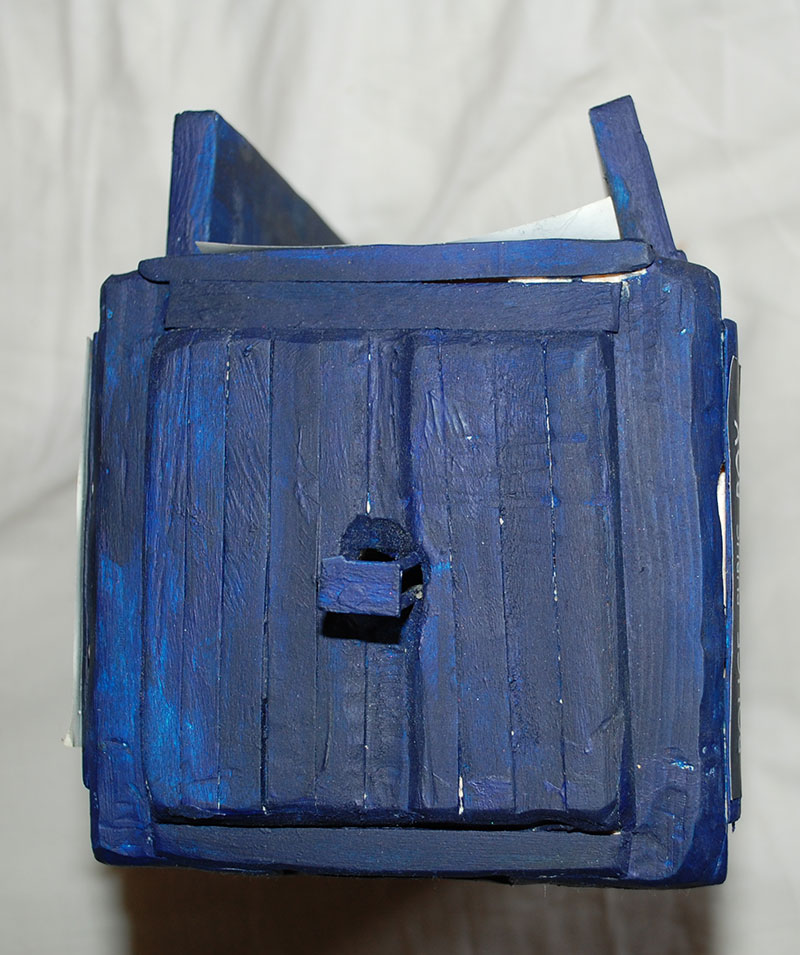
Lots of lollipop sticks here to cover up the gaps.
Not so much with the paneling, but note the gap there - that's for hdmi & power cable access.
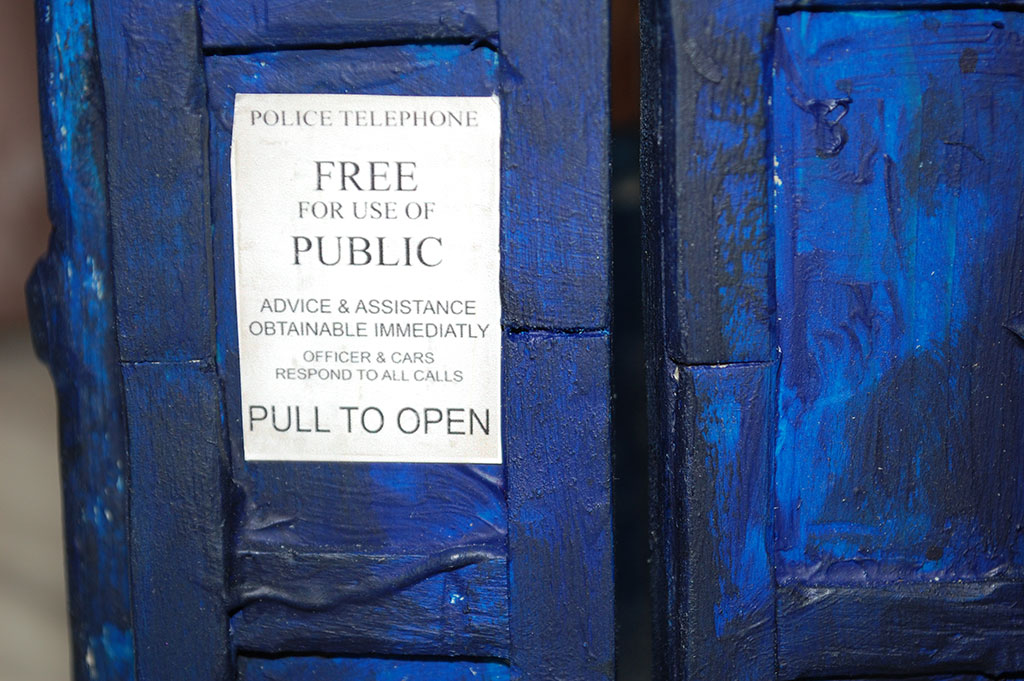
You can see the sloppy paint, and the panel joints clearer here. There should be a St. John's Ambulance sticker here too but I forgot that one.
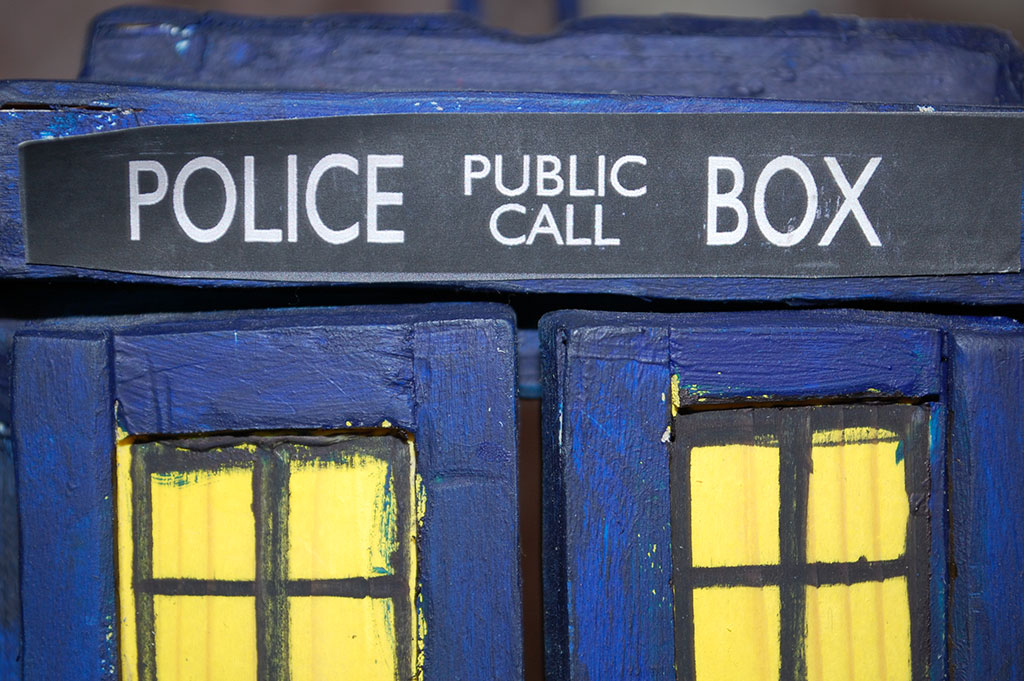
Slightly pealing top sticker, and badly drawn window frames.

The lamp is a bit of a stretch - it should be round, have glass and be a bit more developed that this, but yeah match sticks will do.